
How to add Wifi to Raspberry PI? Raspberry PI is incredibly intuitive and almost limitless for programming and other applications.
However, one popular question asked multiple times before using the board for anything serious is how to add Wifi to Raspberry PI.
Luckily, there are various ways to configure your Raspberry PI’s Wifi, even without attaching a screen. So today, we’ll explore these methods in simple steps.
This article will also discuss what to do if you have an older PI model or a faulty onboard Wifi.
Are you ready? Let’s begin.
Table of Contents
- Can I Use Wifi with Incompatible or Broken PI Hardware?
- Different Methods to Setup Wifi on Raspberry PI
- How to Add Wifi to a Headless Raspberry PI?
- How to Test your Wifi Connection
- Rounding Up
Can I Use Wifi with Incompatible or Broken PI Hardware?
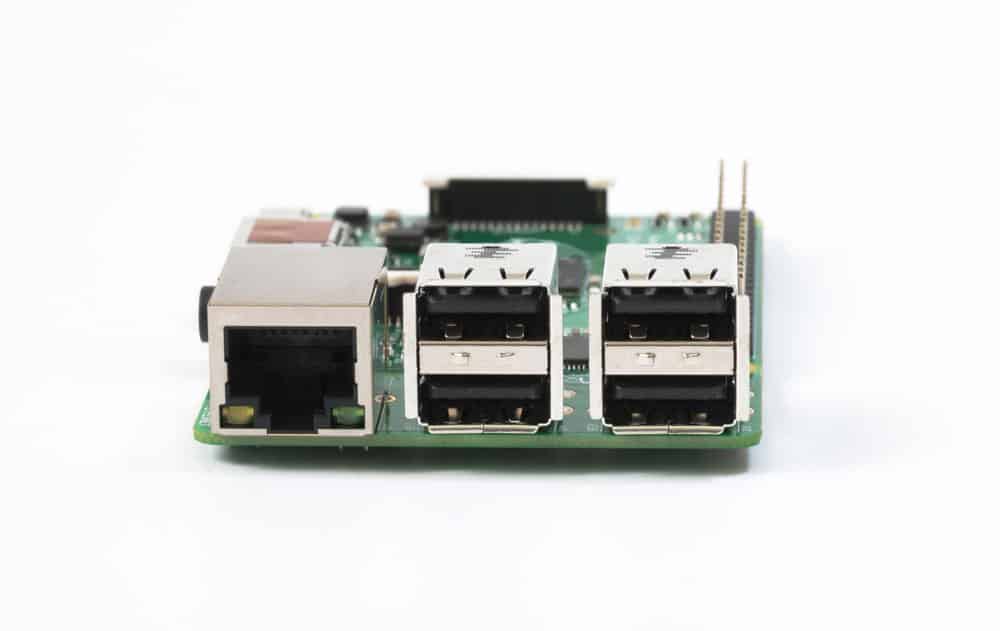
PI board with LAN port
Keep reading if you have the older PI models or updated boards with broken onboard Wifi.
So, you can use two simple fixes to enable your board’s access to the internet.
First, you can set up a wired ethernet connection. You can connect the PI board to your network router through an RJ45 or ethernet cable. After plugging it in, the PI’s network LED should start blinking.
Usually, the wired connection should be up and ready at this stage—but only if you enabled DHCP on your router. If you’ve not, it’s also an easy process.
Start by accessing your router’s management console (you can use another connected computer).
You can do this by entering its IP address in any internet browser. Then, navigate to the settings and activate DHCP.
If wired connections are not your thing, you can opt for an external USB Wifi adapter instead. However, remember that you may need an external power supply for older models to handle the high current draw.
Different Methods to Setup Wifi on Raspberry PI

Wifi connection
Let’s look at all the methods to configure your Raspberry PI’s Wifi.
Method 1: Use the Raspberry PI Imager
The Raspberry PI imager received new updates that made setting up your Wifi easier. And the best part is that this method works even if you run a headless setup. So here’s how to begin.
- Start by installing the latest version of the Raspberry PI imager.
- Open it after the installation to ensure everything is correct.
- Then, click Ctrl+Shift+X (or CMD+Shift+X for Mac) to open the Raspberry Pi imager’s advanced menu.
- Search for “Configure Wifi” and check the box. It should allow you to input your Wifi credentials.
- Finally, save your settings and flash the OS to your Raspberry PI’s microSD card.
Note: Change the Wifi country in “Configure Wifi” according to your country’s code. Also, you can explore other settings, like “Turn on SSH” for headless installations.
Method 2: Use Raspberry PI OS GUI
If you’re running a Raspberry PI OS desktop, it’s easy to configure your Wifi with the provided GUI. And it works similarly to setting up Wifi on other smart devices, like laptops, smartphones, etc.
Method 3: Use Command Line with Raspi-Config
Are you running a Raspberry PI server distribution without a GUI? Then, you can use Raspi-Config as an alternative to method 2. Also, it works on a Raspberry PI OS desktop setup.
What’s more? You can use this console-based application for configuring various Raspberry PI settings. For example, you can use it for network configuration, accessing boot options, and remote access setup.
You can open Raspi-Config using the following code:

Then, you can use your keyboard’s arrow keys to move to “Network Options” and click Enter. Next, choose Wifi and follow the next on-screen instructions to input your SSID and password.
After, close the Raspi-Config menu and reboot the Raspberry PI to connect to the Wifi.
How to Add Wifi to a Headless Raspberry PI?
This article mentions “headless setup” a lot, but what does it mean? A headless Raspberry PI refers to boards you run without a keyboard, mouse, or monitor.
And there are other methods you can use for headless Raspberry PI setups. So let’s take a closer look.
Activate Secure Shell (SSH)
Before diving into the methods, you must enable SSH on the Raspberry PI. It’s an essential setting for running your Raspberry PI headless.
Why? Because with SSH, you can access the internet and run terminal commands on your Raspberry PI remotely from a primary computer.
You can activate SSH on a headless setup by placing a file titled “ssh” (without an extension) on your SD card’s boot partition. Consequently, it will instruct the PI board to enable SSH when booting.
Now, let’s get to the configuration methods.
Method 1: Use an Ethernet Cable
An ethernet connection can use SSH to help you set up the Raspberry PI’s Wifi connection. Once you establish the connection between your PI and router, head to the DHCP allocation section on the management console to find the board’s IP address.
With the IP address, you can use an SSH client (like PuTTY) to access the Raspberry PI on Windows. Or you can use SSH on MacOS and Linux without extra software.
For Linux or MacOS, input the following command with your Raspberry PI’s IP address.

After connecting successfully, use the next command to open the configuration panel.

Now, you can configure the Wifi connection as we did in the previous methods.
Method 2: Use wpa_supplicant
This method requires a little more tweaking. For instance, you can access the Wifi configuration by using the wpa_supplicant.conf file on the Raspberry to access the Wifi configuration.
You can do this by creating a wpa_supplicant.conf file with the following content.
Note: You can use any text editor.
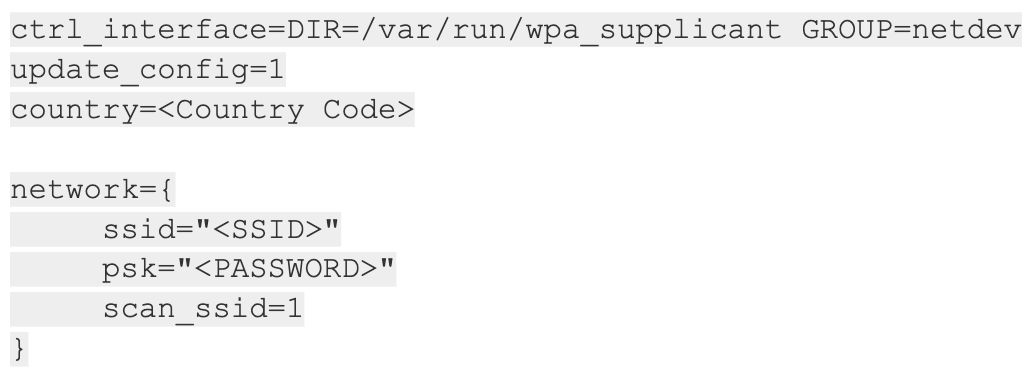
Don’t forget to switch <Country Code>, <SSID>, and <PASSWORD> with the relevant details. Click here to learn more about country codes.
Next, mount your Raspberry PI OS SD card and copy the wpa_supplicant.conf file you just created to the /boot partition’s root. Like the process for enabling SSH, the Raspberry PI will use the file to apply your Wifi settings when booting.
However, it may be tricky to troubleshoot this method on headless setups. But if it fails on the first attempt, check the name of the file and its contents to confirm that everything is correct before the next try.
How to Test your Wifi Connection
Let’s look at how to test your wifi connection after using any of the above methods.
Check IP Address
You can check your IP address to ensure everything works correctly. But first, unplug your ethernet cable before using the following command.

Consequently, you should see a bunch of information after inputting the code. But next to “init,” you should see the PI’s IP address, indicating an established connection.
Ping a Website
Alternatively, you can check if your Wifi connection allows sending and retrieving data from any website. For example, try ping google.com to see if it reaches the Raspberry PI.
Rounding Up
Raspberry PI is incredible! But you may not harness its full potential by configuring your Wifi. In truth, accessing the internet through a PI board opens more possibilities, like a full desktop experience, advanced robotics, and more.
But while the newer models come with pre-installed wireless connection modules, the older ones do not have such features. Thankfully, you can solve the lack of wireless connectivity with an external USB Wifi.
We’ve also shown you multiple ways to configure the Wifi on regular and headless Raspberry PI setups. Remember to test the connection after using any of the methods.
Do you have more questions? Feel free to ask, and we’ll be glad to help.